
Over the summer, I was asked to make banners for my cousin’s wedding. (When my day will come, I’ll never know.) So what’s with the blog entry on something that just involves cutting up paper, glueing letters on, and stringing them together? I found that multiple entries suggested running a string through each piece. However, you wouldn’t be able to space them out this way. This here provides brief explanations on how I created these banners with a focus on threading the pieces.
GLITTERY LETTERS
Print out the letters and cut them out. (I recommend Fontspace for a plethora of free fonts.) Spray adhesive is the glue of choice to evenly affix the glitter onto the letters without crinkling the paper. Depending on the coverage, you may want to add a second layer of glitter. Alternatively, you can print the outline of the letters onto decorative (printer-friendly) paper, and that will save you time.
POLYGONAL BUNTING
Essentially it’s a rectangle with the corners cut off at the bottom. (A fellow called them “teeth”, and my alter ego wanted to punch his teeth out and string them together with dental floss.) I used a pencil to roll the top of the each piece to the desired length, and secured it with tape. When threading, I did a variation of what sewers would call a “backstitch”. You thread the string through the tunnel, you just made, bring it around and thread it through the tunnel again. You may have to pull the string slightly taut to keep it from getting loose. It’s okay if the sides bend inwards to the tension – so long as you don’t go ham on the pulling and rip the banner. This gives you more control of the spacing between the letters.

BUNTING
For this one, I just hole-punched the corners. I was in a bit of a pickle figuring out how to thread these pieces together and still be able to space them out. Crafty Ribbons had a really adorable idea to tie bows in between each triangle, but I didn’t think that this would be appropriate for the style of the wedding. We’re going to use the “backstitch” technique again, except that you do a backstitch on each hole before you connect the string to the next hole. Otherwise, if you simply thread it through, then the corners will overlap with each other, and you won’t be able to control the spacing between each sign. Another thing you can do is to laminate the bunting to protect them from potential water damage.
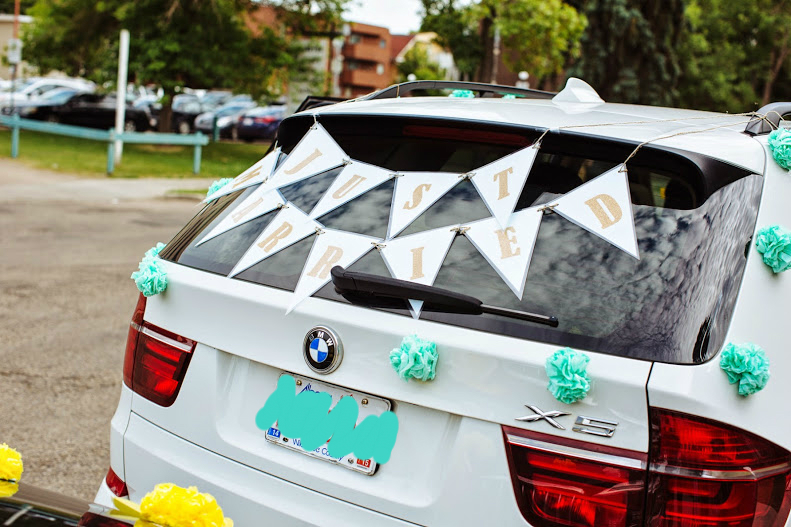
Special thanks to my cousin and her husband for giving me the chance to contribute to their wedding creatively and to their photographer for the images.
